
基于声明的认证
Claim 通常被翻译成声明,但是感觉过于生硬,还是使用Claim来称呼更加自然一些。记得是在MVC5中,第一次接触到 “Claim" 的概念。在MVC5之前,我们所熟悉的是Windows认证和Forms认证,Windows认证通常用于企业内部,我们使用最多的还是Forms认证,先来回顾一下,以前是怎么使用的:
首先我们会在web.config中配置认证模式:
<authentication mode="Forms">
    <forms loginUrl="~/Account/LogOn" timeout="2880" /></authentication>
认证票据的生成是使用FormsAuthentication来完成的:
FormsAuthentication.SetAuthCookie("bob", true);
然后便可以通过HttpContext.User.Identity.Name获取到当前登录用户的名称:"bob",那么它是如何来完成认证的呢?
在 ASP.NET 4.x 中,我们应该都对 HttpModule 比较了解,它类似于 ASP.NET Core 中的中件间,ASP.NET 默认会在全局的 administration.config 文件中注册一大堆HttpModule,其中就包括WindowsAuthentication和FormsAuthentication,用来实现Windows认证和Forms认证:
<moduleProviders>
    <!-- Server Modules-->
    <add name="Authentication" type="Microsoft.Web.Management.Iis.Authentication.AuthenticationModuleProvider, Microsoft.Web.Management.Iis, Version=10.0.0.0, Culture=neutral, PublicKeyToken=31bf3856ad364e35" />
    <add name="AnonymousAuthentication" type="Microsoft.Web.Management.Iis.Authentication.AnonymousAuthenticationModuleProvider, Microsoft.Web.Management.Iis, Version=10.0.0.0, Culture=neutral, PublicKeyToken=31bf3856ad364e35" />
    <add name="BasicAuthentication" type="Microsoft.Web.Management.Iis.Authentication.BasicAuthenticationModuleProvider, Microsoft.Web.Management.Iis, Version=10.0.0.0, Culture=neutral, PublicKeyToken=31bf3856ad364e35" />
    <add name="ActiveDirectoryAuthentication" type="Microsoft.Web.Management.Iis.Authentication.ActiveDirectoryAuthenticationModuleProvider, Microsoft.Web.Management.Iis, Version=10.0.0.0, Culture=neutral, PublicKeyToken=31bf3856ad364e35" />
    <add name="WindowsAuthentication" type="Microsoft.Web.Management.Iis.Authentication.WindowsAuthenticationModuleProvider, Microsoft.Web.Management.Iis, Version=10.0.0.0, Culture=neutral, PublicKeyToken=31bf3856ad364e35" />
    <add name="DigestAuthentication" type="Microsoft.Web.Management.Iis.Authentication.DigestAuthenticationModuleProvider, Microsoft.Web.Management.Iis, Version=10.0.0.0, Culture=neutral, PublicKeyToken=31bf3856ad364e35" />

    <!-- ASP.NET Modules-->
    <add name="FormsAuthentication" type="Microsoft.Web.Management.AspNet.Authentication.FormsAuthenticationModuleProvider, Microsoft.Web.Management.Aspnet, Version=10.0.0.0, Culture=neutral, PublicKeyToken=31bf3856ad364e35" />
可能大多人都不知道有这些Module,这也是微软技术的一大弊端,总想着封装成傻瓜化,造成入门容易,精通太难的局面。
如上,我们可以看到生成票据时,默认只能转入一个Name,当然也可以通过手动创建FormsAuthenticationTicket来附带一些额外的信息,但是都太过麻烦。
在传统的身份认证中,每个应用程序都有它自己的验证用户身份的方式,以及它自己的用户数据库。这种方式有很大的局限性,因为它很难集成多种认证方式以支持用户使用不同的方式来访问我们的应用程序,比如组织内的用户(Windows-baseed 认证),其它组织的用户(Identity federation)或者是来自互联网的用户(Forms-based 认证)等等。
而Claim 是关于一个人或组织的某个主题的陈述,比如:一个人的名称,角色,个人喜好,种族,特权,社团,能力等等。它本质上就是一个键值对,是一种非常通用的保存用户信息的方式,可以很容易的将认证和授权分离开来,前者用来表示用户是/不是什么,后者用来表示用户能/不能做什么。
因此基于声明的认证有两个主要的特点:
-
将认证与授权拆分成两个独立的服务。
-
在需要授权的服务中,不用再去关心你是如何认证的,你用Windows认证也好,Forms认证也行,只要你出示你的 Claims 就行了。
ASP.NET Core 中的用户身份
Claim
在 ASP.NET Core 中,使用Cliam类来表示用户身份中的一项信息,它由核心的Type和Value属性构成:
public class Claim{
   private readonly string _type;
  private readonly string _value;
  public Claim(string type, string value)
        : this(type, value, ClaimValueTypes.String, ClaimsIdentity.DefaultIssuer, ClaimsIdentity.DefaultIssuer, null, null, null)    {
    }    internal Claim(string type, string value, string valueType, string issuer, string originalIssuer, ClaimsIdentity subject, string propertyKey, string propertyValue)    {
        ...
    }

    public string Type => _type;    public string Value => _value;
}
一个Claim可以是“用户的姓名”,“邮箱地址”,“电话”,等等,而多个Claim构成一个用户的身份,使用ClaimsIdentity类来表示:
ClaimsIdentity
public class ClaimsIdentity : IIdentity{

    public virtual IEnumerable<Claim> Claims {get;}

    public virtual string AuthenticationType => _authenticationType;

    public virtual bool IsAuthenticated => !string.IsNullOrEmpty(_authenticationType);

    public virtual string Name
    {
         get
        {
            Claim claim = FindFirst(_nameClaimType);
               if (claim != null) return claim.Value;
                      return null;
        }
    }

}
如上,其Name属性用来查找Claims中,第一个Type为我们创建ClaimsIdentity时指定的NameClaimType的Claim的值,若未指定Type时则使用默认的ClaimTypes.Name。而IsAuthenticated只是判断_authenticationType是否为空,_authenticationType则对应上一章中介绍的Scheme。
下面,我们演示一下用户身份的创建:
// 创建一个用户身份,注意需要指定AuthenticationType,否则IsAuthenticated将为false。var claimIdentity = new ClaimsIdentity("myAuthenticationType");// 添加几个ClaimclaimIdentity.AddClaim(new Claim(ClaimTypes.Name, "bob"));
claimIdentity.AddClaim(new Claim(ClaimTypes.Email, "bob@gmail.com"));
claimIdentity.AddClaim(new Claim(ClaimTypes.MobilePhone, "18888888888"));
如上,我们可以根据需要添加任意个的Claim,最后我们还需要再将用户身份放到ClaimsPrincipal对象中。
ClaimsPrincipal
那么,ClaimsPrincipal是什么呢?在 ASP.NET 4.x 中我们可能对IPrincipal接口比较熟悉,在Controller中的User属性便是IPrincipal类型:
public interface IPrincipal{
    IIdentity Identity { get; }

    bool IsInRole(string role);
}
可以看到IPrincipal除了包含用户身份外,还有一个IsInRole方法,用于判断用户是否属于指定角色,在基于角色的授权当中便是调用此方法来实现的。
而在 ASP.NET Core 中,HttpContext直接使用的就是ClaimsPrincipal类型,而不再使用IPrincipal。
public abstract class HttpContext{
     public abstract ClaimsPrincipal User { get; set; }
}
而在ClaimsPrincipal中,可以包含多个用户身份(ClaimsIdentity),除了对用户身份的操作,还提供了针对Claims的查询:
public class ClaimsPrincipal : IPrincipal{

 private readonly List<ClaimsIdentity> _identities = new List<ClaimsIdentity>();

 public ClaimsPrincipal(IEnumerable<ClaimsIdentity> identities)
    {
        _identities.AddRange(identities);
    }

    // 默认从_identities中查找第一个不为空的ClaimsIdentity,也可以自定义查找方式。
    public virtual System.Security.Principal.IIdentity Identity {}
    // 查找_identities中是否包含类型为RoleClaimType(在创建ClaimsIdentity时指定,或者默认的ClaimTypes.Role)的Claim。
    public virtual bool IsInRole(string role) {}
    // 获取所有身份的Claim集合
    public virtual IEnumerable<Claim> Claims
    {
     get
         {
          foreach (ClaimsIdentity identity in Identities)
            {
                foreach (Claim claim in identity.Claims)
                {
                     yield return claim;
                }
            }
        }
    }
}
ClaimsPrincipal的创建非常简单,只需传入我们上面创建的用户身份即可:
var principal = new ClaimsPrincipal(claimIdentity);
由于HTTP是无状态的,我们通常使用Cookie,请求头或请求参数等方式来附加用户的信息,在网络上进行传输,这就涉及到序列化和安全方面的问题。因此,还需要将principal对象包装成AuthenticationTicket对象。
AuthenticationTicket
当我们创建完ClaimsPrincipal对象后,需要将它生成一个用户票据并颁发给用户,然后用户拿着这个票据,便可以访问受保持的资源,而在 ASP.NET Core 中,用户票据用AuthenticationTicket来表示,如在Cookie认证中,其认证后的Cookie值便是对该对象序列化后的结果,它的定义如下:
public class AuthenticationTicket{

 public AuthenticationTicket(ClaimsPrincipal principal, AuthenticationProperties properties, string authenticationScheme)    {
        AuthenticationScheme = authenticationScheme;
        Principal = principal;
        Properties = properties ?? new AuthenticationProperties();
    }

    public AuthenticationTicket(ClaimsPrincipal principal, string authenticationScheme)
        : this(principal, properties: null, authenticationScheme: authenticationScheme) { }

    public string AuthenticationScheme { get; private set; }

    public ClaimsPrincipal Principal { get; private set; }

    public AuthenticationProperties Properties { get; private set; }
}
用户票据除了包含上面创建的principal对象外,还需要指定一个AuthenticationScheme (通常在授权中用来验证Scheme),并且还包含一个AuthenticationProperties对象,它主要是一些用户票据安全方面的一些配置,如过期时间,是否持久等。
var properties = new AuthenticationProperties();

var ticket = new AuthenticationTicket(principal, properties, "myScheme");// 加密 序列化

var token = Protect(ticket);
最后,我们可以将票据(token)写入到Cookie中,或是也可以以JSON的形式返回让客户端自行保存,由于我们对票据进行了加密,可以保证在网络中安全的传输而不会被篡改。
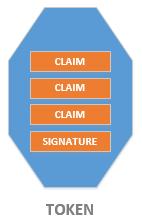
最终身份令牌的结构大概是这样的:
Microsoft.AspNetCore.Authentication
上面,我们介绍了身份票据的创建过程,下面就来介绍一下 ASP.NET Core 中的身份认证。
ASP.NET Core 中的认证系统具体实现在 Security 项目中,它包含 Cookie, JwtBearer, OAuth, OpenIdConnect 等:
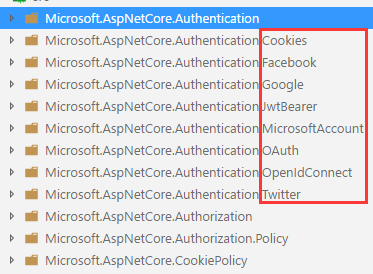
认证系统提供了非常灵活的扩展,可以让我们很容易的实现自定义认证方式。
Usage
而对于认证系统的配置,分为两步,也是我们所熟悉的注册服务和配置中间件:
首先,在DI中注册服务认证所需的服务:
public void ConfigureServices(IServiceCollection services){
    services.AddAuthentication(options =>
    {
        options.DefaultAuthenticateScheme = CookieAuthenticationDefaults.AuthenticationScheme;
        options.DefaultSignInScheme = CookieAuthenticationDefaults.AuthenticationScheme;
        options.DefaultChallengeScheme = OpenIdConnectDefaults.AuthenticationScheme;
    })
    .AddCookie()
    .AddOpenIdConnect(o =>
    {
        o.ClientId = "server.hybrid";
        o.ClientSecret = "secret";
        o.Authority = "https://demo.identityserver.io/";
        o.ResponseType = OpenIdConnectResponseType.CodeIdToken;
    });
}
最后,注册认证中间件:
public void Configure(IApplicationBuilder app){
    app.UseAuthentication();
}
如上,我们的系统便支持了Cookie和JwtBearer两种认证方式,是不是非常简单,在我们的应用程序中使用认证系统时,只需要调用 上一章 介绍的 HttpContext 中认证相关的扩展方法即可。
Microsoft.AspNetCore.Authentication,是所有认证实现的公共抽象类,它定义了实现认证Handler的规范,并包含一些共用的方法,如令牌加密,序列化等,AddAuthentication 便是其提供的统一的注册认证服务的扩展方法:
AddAuthentication
public static AuthenticationBuilder AddAuthentication(this IServiceCollection services){
    services.AddAuthenticationCore();
    services.AddDataProtection();
    services.AddWebEncoders();
    services.TryAddSingleton<ISystemClock, SystemClock>();
    eturn new AuthenticationBuilder(services);
}

public static AuthenticationBuilder AddAuthentication(this IServiceCollection services, Action<AuthenticationOptions> configureOptions)
{    var builder = services.AddAuthentication();
    services.Configure(configureOptions);    return builder;
}
如上,它首先会调用上一章中介绍的AddAuthenticationCore方法,然后注册了DataProtection和WebEncoders两个服务。而对 AuthenticationOptions 我们之前在IAuthenticationSchemeProvider也介绍过,它用来配置Scheme。
AddScheme
在上面的 AddAuthentication 中返回的是一个AuthenticationBuilder类型,所有认证Handler的注册都是以它的扩展形式来实现的,它同时也提供了AddScheme扩展方法,使我们可以更加方便的来配置Scheme:
public class AuthenticationBuilder{    public AuthenticationBuilder(IServiceCollection services)        => Services = services;    public virtual IServiceCollection Services { get; }    public virtual AuthenticationBuilder AddScheme<TOptions, THandler>(string authenticationScheme, Action<TOptions> configureOptions)        where TOptions : AuthenticationSchemeOptions, new()        where THandler : AuthenticationHandler<TOptions>
        => AddScheme<TOptions, THandler>(authenticationScheme, displayName: null, configureOptions: configureOptions);    public virtual AuthenticationBuilder AddScheme<TOptions, THandler>(string authenticationScheme, string displayName, Action<TOptions> configureOptions)        where TOptions : AuthenticationSchemeOptions, new()        where THandler : AuthenticationHandler<TOptions>
    {
        Services.Configure<AuthenticationOptions>(o =>
        {
            o.AddScheme(authenticationScheme, scheme => {
                scheme.HandlerType = typeof(THandler);
                scheme.DisplayName = displayName;
            });
        });        if (configureOptions != null)
        {
            Services.Configure(authenticationScheme, configureOptions);
        }
        Services.AddTransient<THandler>();        return this;
    }
}
在这里的AddScheme 扩展方法只是封装了对AuthenticationOptions中AddScheme的调用,如上面示例中的AddCookie便是调用该扩展方法来实现的。
AddRemoteScheme
看到 Remote 我们应该就可以猜到它是一种远程验证方式,先看一下它的定义:
public class AuthenticationBuilder{

  public virtual AuthenticationBuilder AddRemoteScheme<TOptions, THandler>(string authenticationScheme, string displayName, Action<TOptions> configureOptions)        where TOptions : RemoteAuthenticationOptions, new()        where THandler : RemoteAuthenticationHandler<TOptions>
    {
        Services.TryAddEnumerable(ServiceDescriptor.Singleton<IPostConfigureOptions<TOptions>, EnsureSignInScheme<TOptions>>());        return AddScheme<TOptions, THandler>(authenticationScheme, displayName, configureOptions: configureOptions);
    }

    private class EnsureSignInScheme<TOptions> : IPostConfigureOptions<TOptions> where TOptions : RemoteAuthenticationOptions
    {        private readonly AuthenticationOptions _authOptions;


    public EnsureSignInScheme(IOptions<AuthenticationOptions> authOptions)        {
            _authOptions = authOptions.Value;
        }

    public void PostConfigure(string name, TOptions options)
             {
            options.SignInScheme = options.SignInScheme ?? _authOptions.DefaultSignInScheme ?? _authOptions.DefaultScheme;            if (string.Equals(options.SignInScheme, name, StringComparison.Ordinal))
            {
                   throw new InvalidOperationException(Resources.Exception_RemoteSignInSchemeCannotBeSelf);
            }
        }
    }
}
首先使用PostConfigure模式(参见:Options[1]:Configure),对RemoteAuthenticationOptions进行验证,要求远程验证中指定的SignInScheme不能为自身,这是为什么呢?后文再来解释。然后便是直接调用上面介绍的 AddScheme 方法。
关于远程验证相对比较复杂,在本章中并不会太过深入的来介绍,在后续其它文章中会逐渐深入。
UseAuthentication
在上面,注册认证中间件时,我们只需调用一个UseAuthentication扩展方法,因为它会执行我们注册的所有认证Handler:
public static IApplicationBuilder UseAuthentication(this IApplicationBuilder app){
         return app.UseMiddleware<AuthenticationMiddleware>();
}
咦,它的代码好简单,只是注册了一个 AuthenticationMiddleware 而已,迫不及待的想看看它的实现:
public class AuthenticationMiddleware{

 private readonly RequestDelegate _next;

 public IAuthenticationSchemeProvider Schemes { get; set; }

  public async Task Invoke(HttpContext context)    {
        context.Features.Set<IAuthenticationFeature>(new AuthenticationFeature
        {
            OriginalPath = context.Request.Path,
            OriginalPathBase = context.Request.PathBase
        });

        var handlers = context.RequestServices.GetRequiredService<IAuthenticationHandlerProvider>();

        foreach (var scheme in await Schemes.GetRequestHandlerSchemesAsync())
        {
            var handler = await handlers.GetHandlerAsync(context, scheme.Name) as IAuthenticationRequestHandler;
           if (handler != null && await handler.HandleRequestAsync())
            {
              return;
            }
        }

        var defaultAuthenticate = await Schemes.GetDefaultAuthenticateSchemeAsync();
            if (defaultAuthenticate != null)
        {
         var result = await context.AuthenticateAsync(defaultAuthenticate.Name);
                if (result?.Principal != null)
            {
                context.User = result.Principal;
            }
        }
        await _next(context);
    }
}
很简单,但是很强大,不管我们是使用Cookie认证,还是Bearer认证,等等,都只需要这一个中间件,因为它会解析所有的Handler来执行。
不过,在这里,这会先判断是否具体实现了IAuthenticationRequestHandler的Hander,优先来执行,这个是什么鬼?
查了一下,发现IAuthenticationRequestHandler是在HttpAbstractions中定义的:
public interface IAuthenticationRequestHandler : IAuthenticationHandler{
 Task<bool> HandleRequestAsync();
}
它多了一个HandleRequestAsync方法,那么它存在的意义是什么呢?其实在Cookie认证中并没有用到它,它通常在远程认证(如:OAuth, OIDC等)中使用,下文再来介绍。
继续分析上面代码,通过调用Schemes.GetDefaultAuthenticateSchemeAsync来获取到认证的Scheme,也就是上文提到的问题,我们必须指定默认的Scheme。
最后,调用AuthenticateAsync方法进行认证,认证成功后,为HttpContext.User赋值,至于如何解析身份令牌生成ClaimsPrincipal对象,则交给相应的Handler来处理。
认证Handler
上文中多次提到认证Handler,它由统一的AuthenticationMiddleware来调用,负责具体的认证实现,并分为本地认证与远程认证两种方式。
在本地验证中,身份令牌的发放与认证通常是由同一个服务器来完成,这也是我们比较熟悉的场景,对于Cookie, JwtBearer等认证来说,都属于是本地验证。而当我们使用OAuth, OIDC等验证方式时,身份令牌的发放则是由独立的服务或是第三方(QQ, Weibo 等)认证来提供,此时在我们的应用程序中获取身份令牌时需要请求远程服务器,因此称之为远程验证。
AuthenticationHandler
AuthenticationHandler是所有认证Handler的抽象基类,对于本地认证直接实现该类即可,定义如下:
public abstract class AuthenticationHandler<TOptions> : IAuthenticationHandler where TOptions : AuthenticationSchemeOptions, new()
{
    ...
    public async Task InitializeAsync(AuthenticationScheme scheme, HttpContext context)    {
        ...
        await InitializeEventsAsync();

         await InitializeHandlerAsync();
    }

    protected virtual async Task InitializeEventsAsync() { }

      protected virtual Task<object> CreateEventsAsync() => Task.FromResult(new object());

      protected virtual Task InitializeHandlerAsync() => Task.CompletedTask;

      public async Task<AuthenticateResult> AuthenticateAsync()    {
        var result = await HandleAuthenticateOnceAsync();

        ...
    }

    protected Task<AuthenticateResult> HandleAuthenticateOnceAsync()    {

        if (_authenticateTask == null)
        {
            _authenticateTask = HandleAuthenticateAsync();
        }
        return _authenticateTask;
    }

    protected abstract Task<AuthenticateResult> HandleAuthenticateAsync();

    protected virtual Task HandleForbiddenAsync(AuthenticationProperties properties)    {
        Response.StatusCode = 403;        return Task.CompletedTask;
    }

    protected virtual Task HandleChallengeAsync(AuthenticationProperties properties)    {
        Response.StatusCode = 401;        return Task.CompletedTask;
    }

    ...
}
如上,它定义一个抽象方法HandleAuthenticateAsync,并使用HandleAuthenticateOnceAsync方法来保证其在每次认证只执行一次。而HandleAuthenticateAsync是认证的核心,交给具体的认证Handler负责实现。而对于 ChallengeAsync, ForbidAsync 等方法也提供了默认的实现。
而对于HandleAuthenticateAsync的实现,大致的逻辑就是从请求中获取上面发放的身份令牌,然后解析成AuthenticationTicket,并经过一系列的验证,最终返回ClaimsPrincipal对象。
RemoteAuthenticationHandler
RemoteAuthenticationHandler 便是所有远程认证的抽象基类了,它继承自AuthenticationHandler,并实现了IAuthenticationRequestHandler接口:
public abstract class RemoteAuthenticationHandler<TOptions> : AuthenticationHandler<TOptions>, IAuthenticationRequestHandler
    where TOptions : RemoteAuthenticationOptions, new()
{
 public virtual Task<bool> ShouldHandleRequestAsync() => Task.FromResult(Options.CallbackPath == Request.Path);

 public virtual async Task<bool> HandleRequestAsync()    {
     if (!await ShouldHandleRequestAsync())
        {
           return false;
        }
        var authResult = await HandleRemoteAuthenticateAsync();

        ...        await Context.SignInAsync(SignInScheme, ticketContext.Principal, ticketContext.Properties);
        if (string.IsNullOrEmpty(ticketContext.ReturnUri)) ticketContext.ReturnUri = "/";
        Response.Redirect(ticketContext.ReturnUri);
         return true;
    }

     protected abstract Task<HandleRequestResult> HandleRemoteAuthenticateAsync();

     protected override async Task<AuthenticateResult> HandleAuthenticateAsync()    {
          var result = await Context.AuthenticateAsync(SignInScheme);

        ...
    }

    protected override Task HandleForbiddenAsync(AuthenticationProperties properties)
         => Context.ForbidAsync(SignInScheme);
    protected virtual void GenerateCorrelationId(AuthenticationProperties properties) {}

    protected virtual bool ValidateCorrelationId(AuthenticationProperties properties) {}
}
在上面介绍的AuthenticationMiddleware中,提到它会先执行实现了IAuthenticationRequestHandler 接口的Handler(远程认证),之后(若未完成认证)再执行本地认证Handler。
而RemoteAuthenticationHandler中核心的认证逻辑便是 HandleRequestAsync 方法,它主要包含2个步骤:
-
首先执行一个抽象方法HandleRemoteAuthenticateAsync,由具体的Handler来实现,该方法返回的HandleRequestResult对象包含验证的结果(跳过,失败,成功等),在成功时会包含一个ticket对象。
-
若上一步验证成功,则根据返回的ticket,获取到ClaimsPrincipal对象,并调用其它认证Handler的Context.SignInAsync方法。
也就是说,远程Hander会在用户未登录时,指引用户跳转到认证服务器,登录成功后,解析认证服务器传回的凭证,最终依赖于本地Handler来保存身份令牌。当用户再次访问则无需经过远程Handler,直接交给本地Handler来处理。
由此也可以知道,远程认证中本身并不具备SignIn的能力,所以必须通过指定其它SignInScheme交给本地认证来完成 SignIn。
对于其父类的HandleAuthenticateAsync抽象方法则定义了一个默认实现:“直接转交给本地验证来处理”。当我们需要定义自己的远程认证方式时,通常只需实现 HandleRemoteAuthenticateAsync 即可,而不用再去处理 HandleAuthenticateAsync 。
总结
基于声明的认证并不是微软所特有的,它在国外被广泛的使用,如微软的ADFS,Google,Facebook,Twitter等等。在基于声明的认证中,对认证和授权进行了明确的区分,认证用来颁发一个用户的身份标识,其包含这个用户的基本信息,而对于这个身份的颁发则由我们信任的第三方机构来(STS)颁发(当然,你也可以自己来颁发)。而授权,则是通过获取身份标识中的信息,来判断该用户能做什么,不能做什么。
本文对 ASP.NET Core 中认证系统的整个流程做了一个简要的介绍,可能会比较苦涩难懂,不过没关系,大致有个印象就好,下一章则详细介绍一下最常用的本地认证方式:Cookie认证,后续也会详细介绍 OIDC 的用法与实现,到时再回头来看本文或许会豁然开朗。
原文地址: http://www.cnblogs.com/RainingNight/p/introduce-basic-authentication-in-asp-net-core.html